When you click on links to various merchants on this site and make a purchase, this can result in this site earning a commission. Affiliate programs and affiliations include, but are not limited to, the eBay Partner Network.

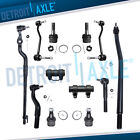
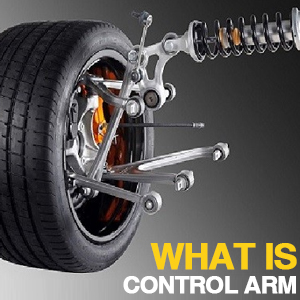
Front Upper & Lower Control Arm W/ Ball Joints for Ford Fusion 2008-2012 6pcs

- Item No : 316474487786
- Condition : New
- Brand : KAX
- Seller : autopart-car
- Current Bid : US $111.99
-
* Item Description
-


US warehouses & Arrival time
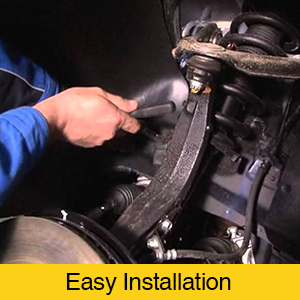
Easy to install, High-quality product
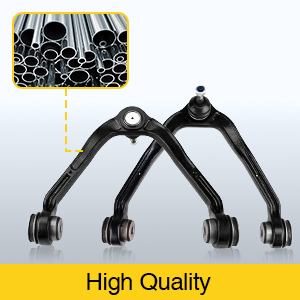
High strength, Long service life
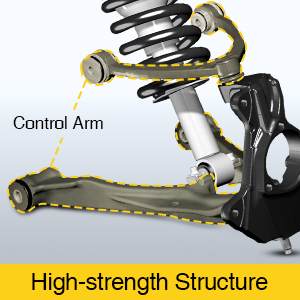
Installation Location
Installation steps
1. Use a car lift to lift the vehicle and treat the fixing screws and nuts of the control arm with rust proof solvent, allowing it to work for a few minutes so that they are easier to loosen.
2. Loosen and remove the fixing screws of the control arm, use a suitable special tool to loosen the ball head at the steering joint, and remove the old control arm.
3. Install the new control arm with the provided accessories and connect the new fixing screws and nuts.
4. Tighten the fixing screws according to the torque specified by the vehicle manufacturer, measure the chassis, and make necessary adjustments.
5. Check the headlamp setting of the vehicle with automatic headlamp leveling device, and adjust it if necessary, where the leveling sensor is connected to the control arm
6. Finally, test drive the vehicle.
Old Control Arms May Cause:
1.Uncontrol: It is impossible to give the body a good buffer effect, the direction cannot be controlled, and the safety problem cannot be guaranteed.
2.Noise: It may also cause abnormal noise from the body when the vehicle is running.
So we need to replace the control arm with a new one to keep the vehicle running normally.