Fitment:
2002 Chevrolet Camaro
2002 Pontiac Firebird
2001 Chevrolet Camaro
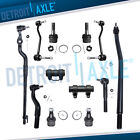
Pakcage included:
2 x Part # K6462 Ball Joint
What do ball joints do?
Ball joints are the critical component of the front suspension that connect various links and allow them to move. Ball joints consist of a ball and socket similar to the hip joint of the human body. Ball joints of your front suspension provide pivoting movement between the steering knuckles and control arms to provide a safe, smooth ride and allow you to precisely control your vehicle.
How Does The Suspension Ball Joint Operate?
The suspension ball joint is essential to a vehicle's suspension system. It allows the suspension system to move freely and absorb shock from the road. By allowing the suspension to move freely, the ball joint reduces the wear and tear on the suspension system, allowing for a smoother, more comfortable ride. The ball joint is a small, cylindrical metal connected to the steering knuckle and the lower control arm. It contains two sealed ball bearings, which allow it to rotate and absorb shock from the road. Between the bearings, a rubber boot used to keep dirt and moisture out helps extend the joint's life and keep it working correctly.
As the suspension moves up and down, the ball joint allows the wheels to move accordingly, keeping the vehicle's tire angle optimal. Without the suspension ball joint, the suspension system would be unable to move freely, and the vehicle would have a harsher, uncomfortable ride. Suspension ball joints need regular checks and maintenance.
The suspension ball joint can malfunction due to wear and tear. Friction from wear and tear causes the ball joint to become loose, leading to erratic movements. Dirt, grime, oil, salt, and other road debris can make it loose over time. A professional may inspect the suspension ball joint for any indication of wear or loose ball joints, such as faint, intermittent clunking noise or uneven tire wear.
When to Replace Suspension Ball Joints?
Given their role in the suspension system, ball joints experience daily wear and tear and, at some point, need replacement. Ball joints should need replacement when they show signs of wear and tear, such as clunking, rattling noises when the suspension moves, drifting to the side, and uneven tire wear. Ball joint replacement is not straightforward. It is necessary though, due to aging and rust. Parts made from premium materials are usually more durable, while parts made from low-grade steel can reduce the lifespan of the ball joint by up to 50 percent.
As a ball joint wears out, more space develops between the stud and the socket, which can cause issues. The constant movement of the ball stud can cause it to become loose and move around inside the socket. Your safety could be at risk if ball joints become too worn out — in severe cases, the stud can pull out of the socket and cause a wheel to become partially disconnected from the vehicle.
Replacing the ball joint:
1.It’s a good rule of thumb to always check the new and old components side by side to make sure your new part matches the one coming out. Take off the new retaining nut and plastic shipping cover.
2.Insert the new ball joint into the knuckle and make sure it’s level.
3.The adapters to install the ball joint are different from the ones you used to remove the old one. A small specially designed adapter fits tightly over the upper portion of the ball joint. Fit this on, and place the press on top of the upper adapter.
4.The lower adapter fits over the large ball joint screw under the ball joint, with room for the stud and threads so that they won’t get damaged during the installation process.
5.Make sure everything is square and true to the knuckle, and wind the press up to tighten it by hand. It’s very important to press the joint in in a level and square manner, with the joint centered and aligned to the knuckle. Wiggle while tightening to make sure everything remains straight.
6.Once you are sure you have clearance and everything is safe and secure, use a socket wrench to finish pressing in the ball joint with the press.
7.Once the upper mating surface of the joint meets securely with the knuckle, you can remove the press. Make sure that the rubber boot hasn’t been nicked or touched, and that the threads remain safe and undamaged. Check that the ball joint has pressed fully down.
8.Begin working the axle shaft back into the wheel bearing. Apply a bit of rust penetrant to help it slide back in properly. Match the splines into the hub.
9.Re-secure the knuckle and the new ball joint stud to the lower control arm. Make sure the axle is feeding through properly and starting to poke through the outside of the hub assembly.
10.Add the securing nut and tighten with a socket wrench.
11.Add the cotter pin.
12.Reinstall the axle nut and torque it to manufacturer specifications. If it’s not all the way through, you can grab the outside CV joint to help you.
13.Finally, you can safely lower the vehicle to the ground. Finish up the job by taking the vehicle to get an alignment.
Note:
1.Please check above compatibility list to make sure it fits your vehicle.
2.If you have any questions about the product after receiving it, please feel free to contact us